Will Cooke
on 17 September 2018
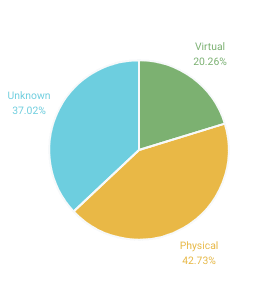
Today we’re very pleased to announce that an optimised Ubuntu Desktop image is available from the Hyper-V gallery. This will give an optimum experience when running Ubuntu Desktop as a guest on a Windows 10 Pro desktop host. From the Ubuntu Report data we know that a lot of people are using Ubuntu as a virtual machine, and so we want to make that experience as seamless as possible.

Our friends over at Microsoft have worked with XRDP upstream to add support for their Enhanced Session Mode, which provides tight integration between a Windows host and the Ubuntu virtual machine running in Hyper-V. The next obvious step was to create a bootable Hyper-V image of Ubuntu Desktop 18.04 LTS which includes XRDP pre-configured to take advantage of Enhanced Session Mode.
What are the benefits of Enhanced Session Mode?
- Improved clipboard integration
- Dynamic desktop resizing
- Shared folders for easy host/guest file transfer
- Improved mouse experience, seamlessly moving between the host and guest desktops
Thanks to the work Microsoft contributed to the open source XRDP project (an open source implementation of Microsoft’s own Remote Desktop Protocol) Hyper-V users benefit by using hv_sock, a byte-stream based communication mechanism between the host and the guest giving a high bandwidth interconnection between them.
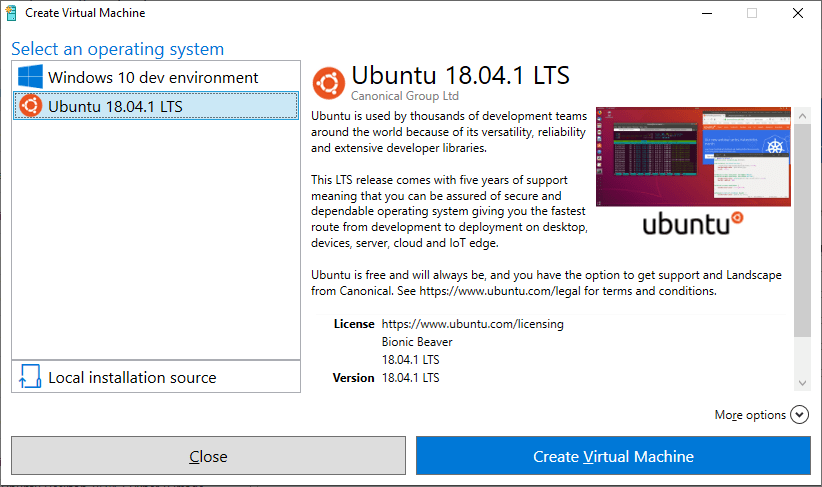
The Ubuntu Desktop 18.04.1 LTS Hyper-V image is available in the Hyper-V Gallery on Windows 10 Pro. Open the Hyper-V Gallery and choose Ubuntu from the list of operating systems:

Once booted you’ll be guided through setting up Ubuntu, including adding your user account, locale and time zone. When the first setup is complete Enhanced Session Mode will automatically be enabled and prompt you to select your display resolution. Once selected, you get an XRDP prompt to login, make sure that “Xorg” is selected from the drop down, enter the username and password that you created during setup and you’ll be logged into a full Ubuntu Desktop session.
For more information on Hyper-V check out the links from this Microsoft blog post.


